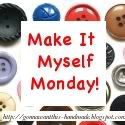
Since I've become a more regular blogger, I've been learning many things...but the learning curve is HUGE! It's like drinking from a fire hose, with all the info that is out there for learning HTML, blog design, etc.
My major goal today was to figure out how to make a blog button AND to be able to get that button onto my blog with an HTML code box in order to allow other readers (such as yourself!) to capture the code and display the blog button on YOUR site! (it is in the upper left sidebar by the way...go on, grab it for your blog...leave a comment and let me know you did!).
It took me about 3 hours to get this figured out. I had to download a program for my Mac (another HUGE learning curve to figure out...thus the fairly simple blog button design for this first one). It is called Gimp and from what I read on reviews, it is very similar to Photoshop. It was a free download and I believe there are formats for PC's too. Check it out HERE.
Here are my Step by Steps for how I created my new little blog button for Make It Myself Mondays:
1. Found a program to work for creating and adjusting images. My Macbook did not have any such program built in, so after some research I downloaded Gimp.
2. I created a 125x125 square in Gimp. From there I found a free image I liked on Stock.Xchnge and copied it to my desktop.
3. Then I pasted the image into the 125x125 square I had opened in Gimp.
4. Next I put a new layer on top of the image background on my 125x125 square. I then made the background on that new layer white, selected font (Chalkboard) and size/color of font and added the main text ("Make It Myself Monday").
5. Next came a third layer, which I situated below the first. I made the background white and selected the size, color and font (Baskerville Italic) for the text and added my blog address. In retrospect I would not have done this because the text is so small you can't even read it.
6. I then saved the image as a JPG to my desktop.
7. I then tried a couple of image sharing sites to upload the image to, in order to find the one I liked best. I settled on Photobucket, and uploaded the JPG image. It worked very nicely for me.
8. I then did some research to find a tutorial about how to add an HTML code box below the blog button so that readers could grab the button to use on their sites as well. I found this post at Blogging with Success to be most helpful. Following the directions, it worked like a charm!
9. I then selected an HTML widget in my Blogger layout, and posted the proper HTML script and hit 'Save'. Checking out my blog showed that the code worked! I double checked it by copying and pasting the code into a blog post...and it worked!
10. Finally I saved the Word document where I had created the HTML code for this button - for easy future reference. Now I'm off to fine tune my skills and create some more buttons for my other blogs!
If YOU decide to participate in "Make It Myself Mondays", there are a few things to know...
1 - Come back on January 25th to link up your post HERE!
2 - Make sure your post focuses on something you created yourself. This post can be a tutorial on how to make something, but it does not have to be a tutorial. A post about what was created is just fine too.
3 - The post does not have to be written on the same day as the MckLinky, nor does it have to have be written on a Monday at all. It can even come from your archives! Just make sure that your link goes directly to the post, not just to your blog main page.
4 - If you link up, please grab the "Make It Myself Monday" blog button (upper left sidebar) and either post it in your sidebar or create a post that links your readers to Gonna Want This-Handmade.
I look forward learning about what YOU made YOURSELF!
**NOTE**
I am a total newbie to both HTML and the Gimp program. This tutorial isn't intended to be a failsafe method for creating your own blog button and HTML code box. However if you find it helpful, let me know!


No comments:
Post a Comment
The beauty of handmade is infinite...originality, eco-friendly, and supportive of small businesses and creativity. Thanks for supporting handmade by your participation on this blog!