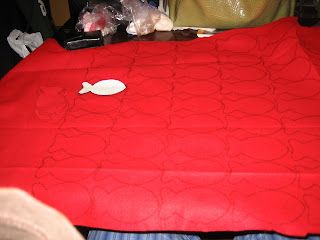
One of the Christmas presents our 4 year old will receive is a felt fish set. This set include 10 large felt fish with numbers 1-10 on them and 26 little fishies with each letter of the alphabet on them. We will use these in our homeschool preschool activities...and our little Sassafrass can use them in her day to day play too.
I didn't have a specific pattern or tutorial to use...I made it up myself! I got the idea for the gift and thought...I can do that! So here's how I did it...
SUPPLIES:
Large piece of medium weight felt (sturdy, but yet thin enough to sew through 2 pieces easily)
Set of adhesive backed felt letters and numbers (I found a package of these at Michael's for under $3 full price)
Sewing Machine (or minimally a needle and thread)
Batting (I used the stuffing from an old pillow that I deconstructed...upcycling!)
Step 1: Find a fish shape online, print out a few sizes and decide which sizes to use. I found my fish pattern HERE and after printing out 3 sizes I decided to use the medium size.
Step 2: Glue the shape to a piece of cardboard (I pulled a cereal box out of our recycling and used that for the cardboard...more upcycling!), and then cut it out to have a pattern to work from.
Step 3: Trace around your pattern on your felt as many times as needed. As I mentioned before, I had originally picked the medium sized pattern. After beginning to trace the fish at that size, I realized I would have enough felt to make all the fish I needed to make! So after tracing enough at the medium size to make 10 fish (for numbers 1-10), I switched to the smaller fish pattern (following steps 1 & 2 above to create my pattern to use). Don't forget that each fish will need two sides...so count how many you will need for your project and then double it! (ie - for my project of numbers 1-10 and the entire alphabet, that was 10 + 26 = 36 x 2 = 72 fish to trace and cut-out! Whew!)
Step 4: After tracing all the shapes you will need, use some cut scissors and cut out the fish. I did this while watching a little HGTV and it made cutting out 72 fish go a bit quicker! :)
Step 5: Pair up your fish (pair the sides that show any marker remnant to the inside so it won't be visible) and then run them right side out through the sewing machine, leaving the tail unstitched. I used a zig-zag stitch on my fish for aesthetic appeal (makes them look a little more 'country handmade-ish"...), but a straight stitch would work just as well.
Step 7: Return the stuffed fish to the sewing machine to sew the tail closed, using the same style stitch.
Step 8: Choose the adhesive-backed felt sticker that you'd like to use, and press firmly in the center of the fishy. And voila! You are finished! (unless your project has another 35 fish to go!)
Couple things to note:
**I thought it would be a great idea to glue magnets to the inside of the fish (before sewing) so that my Sassafrass could use the fishies on the fridge or on a cookie sheet. However I decided to use some leftover magnet announcements from our wedding. I cut them up and glued them on before testing them out. They weren't strong enough to hold the fish to anything through the medium weight felt. Unfortunately I had already glued the weak magnets onto all fish, so I just sewed them with those magnets inside. If you'd like to use the magnet idea, I'd recommend purchasing some stronger round magnets and testing one before gluing the magnets into all the fish!
**If you don't have a sewing machine, you can still do this project! Use a whip stitch to hand sew the fish pieces together. This will be more time consuming, but the fish will be finished with an equally strong and aesthetically appealing stitch.
Have you made something yourself this week? Let a comment and let me know all about it!


