Monday, December 21, 2009

Make It Myself Monday: Preschool Fishies

I'm a little delayed getting this Make It Myself Monday post out!  That is because I've had to take advantage of the naptime today to get more work done on today's project! 


One of the Christmas presents our 4 year old will receive is a felt fish set.  This set include 10 large felt fish with numbers 1-10 on them and 26 little fishies with each letter of the alphabet on them.  We will use these in our homeschool preschool activities...and our little Sassafrass can use them in her day to day play too. 


I didn't have a specific pattern or tutorial to use...I made it up myself!  I got the idea for the gift and thought...I can do that!  So here's how I did it...


SUPPLIES:

Large piece of medium weight felt (sturdy, but yet thin enough to sew through 2 pieces easily)
Set of adhesive backed felt letters and numbers (I found a package of these at Michael's for under $3 full price)
Sewing Machine (or minimally a needle and thread)
Batting (I used the stuffing from an old pillow that I deconstructed...upcycling!)


Step 1:  Find a fish shape online, print out a few sizes and decide which sizes to use.  I found my fish pattern HERE and after printing out 3 sizes I decided to use the medium size.


Step 2:  Glue the shape to a piece of cardboard (I pulled a cereal box out of our recycling and used that for the cardboard...more upcycling!), and then cut it out to have a pattern to work from.


Step 3:  Trace around your pattern on your felt as many times as needed.  As I mentioned before, I had originally picked the medium sized pattern.  After beginning to trace the fish at that size, I realized I would have enough felt to make all the fish I needed to make!  So after tracing enough at the medium size to make 10 fish (for numbers 1-10), I switched to the smaller fish pattern (following steps 1 & 2 above to create my pattern to use).  Don't forget that each fish will need two sides...so count how many you will need for your project and then double it!  (ie - for my project of numbers 1-10 and the entire alphabet, that was 10 + 26 = 36 x 2 = 72 fish to trace and cut-out!  Whew!)


Step 4:  After tracing all the shapes you will need, use some cut scissors and cut out the fish.  I did this while watching a little HGTV and it made cutting out 72 fish go a bit quicker!  :)


Step 5:  Pair up your fish (pair the sides that show any marker remnant to the inside so it won't be visible) and then run them right side out through the sewing machine, leaving the tail unstitched.  I used a zig-zag stitch on my fish for aesthetic appeal (makes them look a little more 'country handmade-ish"...), but a straight stitch would work just as well.


Step 6:  Through the open tail, stuff batting to fill up the fish.  Make the fish puffy but do not overfill. 


Step 7:  Return the stuffed fish to the sewing machine to sew the tail closed, using the same style stitch. 


Step 8:  Choose the adhesive-backed felt sticker that you'd like to use, and press firmly in the center of the fishy.  And voila!  You are finished!  (unless your project has another 35 fish to go!)


Couple things to note:

**I thought it would be a great idea to glue magnets to the inside of the fish (before sewing) so that my Sassafrass could use the fishies on the fridge or on a cookie sheet.  However I decided to use some leftover magnet announcements from our wedding.  I cut them up and glued them on before testing them out.  They weren't strong enough to hold the fish to anything through the medium weight felt.  Unfortunately I had already glued the weak magnets onto all fish, so I just sewed them with those magnets inside.  If you'd like to use the magnet idea, I'd recommend purchasing some stronger round magnets and testing one before gluing the magnets into all the fish!

**If you don't have a sewing machine, you can still do this project!  Use a whip stitch to hand sew the fish pieces together.  This will be more time consuming, but the fish will be finished with an equally strong and aesthetically appealing stitch.


Have you made something yourself this week?  Let a comment and let me know all about it!

Friday, December 18, 2009

Feature Friday: Vintage Sewn!

Pinot Grigio.  Chardonnay.  Merlot.  Reisling.  Pinot Noir.  Savignon Blanc.  Cabernet.  Zinfandel.  

Wine...which is your favorite?  Mine is definitely Reisling...or other sweeter variations of wine. 

Wine is not only enjoyed with dinner...it is often given as a holiday gift, wedding gift, host/hostess gift, etc.  It is quite versatile that way!

And while there are all sorts of paper gift bags designed for wine, how much better would it be to give the gift of wine in a handmade eco-friendly wine bag?!?

Vintage Sewn does just that, making quality, unique and reusable eco-friendly wine bottle bags!

Check out some of the options at Vintage Sewn:

I love these two nature inspired bags...


 $8.95


 $8.95
 
This would make a classy wine gift bag for the holidays...
 
 $7.95


This embroidered felt bag just says 'cozy up with a blanket & glass of  good wine...' to me!...


$9.95

There are more options too (19 in all) on Vintage Sewn's Etsy shop...click on over to check out the options for yourself!  They are all very reasonably priced, from $7.95 to $9.95.

But that is not all that Vintage Sewn is working on!  She recently added a set of nature photo gift cards.  The photography is spectacular, and a great feature is that the photos can be removed from their photo corners in order to be added to to a frame or photo display of your own! 


$14.95 for a set of 10 cards

Here's what Chantel from Vintage Sewn has to say about herself, her work and how she got started!

How long have you been selling your products?

I started making my wine bottle bags in October, to be ready for a November craft sale. After receiving great feedback, I decided to create an Etsy site.

How did you get into it?

I had a wine bottle bag lying around and when I looked at how it was made and the fabric chosen, I knew I would be able to make them using more trendy fabrics and better made quality wise using more luxurious ribbons. As well, I always kept paper wine bottle bags to use for future presents, but the paper bags always got wrinkled and looked used. Using fabric allows the bag to be reused without looking used, as the fabric can be ironed out if necessary.

Is your Etsy shop your primary shop?  Where else could people find your work?

My Etsy shop is my primary online shop, but I have a selection of the wine bottle bags available at Sheppard Wine Works (Yonge and Sheppard intersection in Toronto, ON).  

What inspires your creations?

The fabric inspire my creations. Finding interesting fabrics to use is the most fun part, as it is usually a surprise what I will find. I then find ribbons or buttons to match the fabrics. 

Do you have an all-time favorite piece?  What is it and why?

My favourite so far is the "Reusable Embroidered Felt Wine Bottle Bag w/ Silk Lining". The felt fabric is actually a pillow case, and i think the the vibrant pink lining is unexpected and contrasts perfectly. The bag is accented with a thin black bow which works well as it doesn't try to bring too much attention to itself against the coloured embroidery in the felt.
 
FREE SHIPPING!!
Vintage Sewn is graciously offering shipping deals to readers of Gonna Want This-Handmade!  If you are in Canada, you can receive FREE shipping and all US based orders can receive 1/2 off shipping on their orders!    So go now to Vintage Sewn, browse her site and when you are ready to make an order, contact Chantel through a message on her site with the code 'BLOG FREE SHIP' so she can calculate a final price for you and work out an adjusted price.


Thanks Vintage Sewn!


Thursday, December 17, 2009

O2 Designs Review: Origami Crane Earrings!


Blue Beaded Origami Crane Earrings - $12

I am pretty convinced that Shayna from O2 Designs would make a pretty good surgeon if she wasn't busy making jewelry!  The attention to detail in her work and the miniscule origami folding in her Crane Earrings set shows her talent!

O2 Designs has recently added a number of items to their Etsy shop.  Many are holiday themed items like:


Small Holiday Barrettes - $4


Silver & Gold Post Earrings - $4

Head on over to O2 Designs to get the full scope of the holiday item offerings - there are over 35 and perhaps you could still get in an order in to be fulfilled before Christmas!

However holiday items are not all the O2 Designs have, and new items are being added all the time!  Here are some of the newest additions:


          Pink Button Necklace - $15


  Grey & White Freshwater Pearl Star Necklace - $35


O2 Designs provided me with a pair of blue recycled paper origami crane earrings to review!  I received them in a sturdy white cardboard jewelry size box via US Parcel Post.  The box was wrapped in white butcher paper, so the items were completely secure and there was no risk of the packaging opening up during transit. 

The earrings were nestled in between two large squares of cotton padding.  This definitely helped protect these earrings, though as is indicated on this product description in the O2 Designs shop, these earrings are delicate.  Shayna, the designer, indicated that they may need some slight reshaping after arrival.  They did need a very small bit of reshaping after being jostled in the box during shipping - but the adjustments needed were very minor.  However it is recommended that these earrings be kept in a separate box during jewelry storage rather than being thrown together with a bunch of earrings.  I believe that would cause these crane earrings to lose their shape. 


Upon opening the package with the earrings, I was pleasantly surprised to discover that the earrings were much smaller than I had expected from the photo.  They were actually the perfect size...large enough to be noticeable, but not so large that they are cumbersome or overbearing.  In fact, I felt no weight or pulling when wearing these earrings...they are incredibly light! 

I like that O2 Designs uses recycled paper for these products and other products in the O2 Designs line.  I love encouraging the use of reuse!


The prices at O2 Designs are very reasonable and the earrings I reviewed retail for just $12 - a great price for a unique design! 

These earrings would look great as a feature piece in an understated outfit of black or white top with jeans...or to pair with a coordinating dressier outfit.  I think these earrings would be a fun gift to an older child - my daughter is enamored by them! 


Customer Service:  Good - vendor was able to respond to e-mail requests within 2 days typically.
Packaging and Presentation:  Very good - well packaged for travel.
Quality Construction:  Excellent - I was amazed by the attention to detail and fine craftsmanship for such tiny little creations!
Quality Items:  Very good - These earrings are delicate, but with proper care and storage, they will make a great addition to any jewelry collection.


Thanks Shayna & O2 Designs for the opportunity to review this product!


Wednesday, December 16, 2009

Win It Wednesday!

Here's some handmade giveaways expiring SOON...if you win you may still have time to turn your winnings into a wonderful and free gift for someone special!

Here we go!


This Teddy Bear Picnic Quilt is being given away on One Minute's Worth.  The giveaway ends 'the morning of the 19th', so head on over and enter (PS - as I write there are only 16 entries so far...good odds!).  This would make a super duper cute gift for an infant or preschooler!  Ends December 19th.


Did your mom or grandmother ever talk about getting 'all gussied up' to go somewhere?  Though we don't use the term much today, it basically meant to get yourself all dressed up, looking fancy.  The Etsy shop, Gussy, does the same for everyday items like wallets, cell phone holders, etc.  And Etsy It Up is hosting a giveaway for $30 gift certificate to her shop!  Cool thing is, if you win, you could give the gift certificate to someone, saving on the creating & shipping time...your gift recipient could choose what they'd like themselves.  (but if you are like me, this would be a gift I'd give to myself!  Click HERE to head on over and enter!  Ends December 21st.


Okay, this baby pacifier clip is seriously so cute!  It is handmade by Freakie Toes and the giveaway is hosted by Stuff Parents Need.  This flower clip is made with a silk flower, grosgrain ribbon and sweet litle rhinestone detail in the center of the flower for your littlest girly girl.  The snap at the end allows for easy switching.  The clip ribbon length is in accordance with all major manufacturing of pacifier clips, at 9".  Though I don't have any pacifier users at home, I know this would be a great gift for any parent or parent-to-be out there.  PS - there are pacifier clip options for boys here too.  Ends December 21st.

Finally, there is a HUGE giveaway happening over at VivaBella.  Four winners will receive over $700 worth in handmade cosemetics and jewelry!  Vendors such as Zuii Organic, Pastel Petals, LA Splash, Just Be Designs, Sweet Treats, LashMantra & Epicare all contributed products to this giveaway.  Wonderful!  There have been a number of entries, but with four winners, your odds are still good.  Head over and enter today!  Ends December 19th.

Are you hosting a giveaway for a handmade product/vendor on your site?  Let me know about it in a comment and I'll feature it in a future post!


Monday, December 14, 2009

Make It Myself Monday: Crayon Rolls

My project for this week was to create Crayon Rolls as stocking stuffers for my three kiddos for Christmas presents.  I was inspired by THIS tutorial, found at Chocolate on my Cranium.


I had some fabric scraps that would work for part of the 3 Crayon Rolls that I had to make, but I needed to go out and purchase some coordinating odds & ends scraps to be set.  Also, as a newbie, I had never worked with fuseable interfacing...so I picked up some of that as well.  Finally, even though we have a ton of broken crayons with half-torn-off wrappers; since this was a Christmas gift, I decided to buy some new ones.  I found some cute boxes of 32 at Michael's Craft Store for only $1.00 in various character boxes wrappers (I got Cars, Tinkerbell and Disney Princesses).


Supplies Needed: 

3 pieces of coordinating 13x5 strips of fabric, cut and pressed
1 piece of 13x5 fuseable interfacing
1 piece of coordinating ribbon (24" long)
Sewing machine
Coordinating Thread
Iron
Scissors
Measuring Tape/Ruler
Marking Pencil


1.  Measure and cut out the 3 strips of fabric and the coordinating ribbon.  Also measure and cut out the fuseable interfacing.  In retrospect it would have been wiser to measure and cut out a cardboard pattern to use for the fabric pieces and interfacing to save time and ensure better accuracy.  I plan to do that for the other two rolls I'll finish this week for the girls.

2.  Iron all 3 pieces of fabric.  Iron the rough side of the fuseable interfacing to the wrong side of the piece of fabric you plan to sew the crayon pocket to.  Make sure not to slide the iron, but rather press in sections for 10-15 seconds at a time.


3.  Fold the pocket fabric in half and press.  Situate the pocket onto the right side of the fabric that has had the interfacing ironed to it so that the folded edge hits the middle of the background fabric and the bottom and sides line up with the bottom and sides of the background fabric.


4.  Using the marking pencil (or whatever you use to mark), measure out lines for the crayon slots.  The first measurement from one side should be 1 and 1/4 inch.  Every measurement thereafter should be 3/4 inch until the final measurement, which would once again be 1 and 1/4 inch.  This should leave you with 15 lines (and thus 16 crayon slots).


5.  Stitch each line, being sure to backstitch at both the top and bottom of the line  The measuring, marking and stitching of these slots are what I found to be the most tedious and time consuming.

6.  Once all the lines have been stitched, fold the ribbon in half and stitch it to one side of the roll.  Make sure to then fold the ribbon so that it lays against the right side of the background fabric.  I did not do this and later stitched the ribbon incorrectly while the fabric was inside out...causing me the need to cut the ribbon and improvise a new placement.

7.  Place the right side of the stitched fabric to the right side of the backside fabric so that only the wrong sides are showing.  Make sure the ribbon is tucked inside and not showing either (unlike the picture...).


8.  Stitch at 1/4 inch all the way around the edges, making sure to the leave the side without the ribbon stitched in it open so that the item can be turned right side out again.  When it has been stitched all the way, clip the corners and then turn it right side out again.


9.  Press the item again to ensure front, back and pocket are laying straight.

10.  Topstitch all around the item again on the right sides of the fabric at 1/8 inch from edge - making sure to cleanly close the still-open side.  (note - this is where I place the ribbon that I had messed up earlier, and it worked perfectly).


11.  Once it is entirely completed, press it one more time.  Then insert crayons, roll up and secure with the ribbon tie.


I feel I was successful at this Make It Myself Monday challenge...however when you look at seams closely it is easy to see that they aren't as straight as they could be, nor was the spacing for the crayon slots completely accurate, which is precisely why this roll can only hold 14 crayons instead of 16!


It took me about an hour and 15 minutes to complete all 10 steps above to complete this project.  I was certainly slowed down by the need to check directions frequently.  I do anticipate I can do the other two crayon rolls in less time...likely more like 45 minutes.  I did find this project more time consuming and slightly more challenging than the pillow challenge from last week.  That surprised me!  However I enjoyed the challenge and my kiddos won't care much about slightly crooked seams or 14 crayon slots vs. 16 crayon slots.  These will make great travel companions along with a fun coloring book!


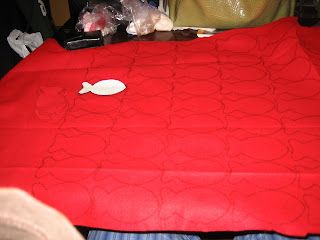
Stay tuned for Make It Myself Monday next week when my completed project will let you know what I used this shape for:


Did you make something yourself recently?  Did you write a blog post about it?  Leave a comment with a link to your post - I would LOVE to read about it!


Friday, December 11, 2009

Feature Friday: Child's Play

Think it is tough to find handmade gifts for kids?  Think again!  There is a wide variety of child-friendly handmade vendors with more creative products than I could ever dream up.  Here is a smattering of a few I have discovered...


Hello Buffalo

This shop is full of the cutest little mini needlefelted and polymer clay animals, like Buffalette, the Baby Owl.  Though Hello Buffalo has only been open on Etsy for a couple weeks the store has started out with some early success and great feedback already.   


This talented Dad is also a poet (see his shop announcements).  I love his focus on toys that encourage imagination and discourage total reliance on modern technology.  I know my son would have all sorts of adventures with the African Animals Set and I would love the simple Nativity set.  My daughters would be fans of the Magic Kingdom Set.  But my faves by far are the wooden iPhone, Cell Phone and Laptop!


Miss Pretty Pretty: Imaginative Play Toys


This vendor creates some awesome heirloom quality table play tents for kids!  All are custom made.  And made with entirely child friendly materials - eco-friendly too!  There are many styles to choose from - Bluebird Cottage, Local Library, Fairy's Tea Party, Animal Sanctuary, Little Mechanic and so many more!  She also does custom creations and has a number of other imaginative play toy items.  Though the deadline for holiday gifts have passed, there is a great post-holiday sale going on at this shop, so check it out!  (PS - This is my favorite tent design...


Sue Dolls

If you have or know of a little princess that loves her Barbies, you'll be able to find something for her at Sue Dolls shop.  Chock full of handmade Barbie clothing, Sue Dolls prices are extremely reasonable too!  I know that this red & feather boa ball dress would be a MAJOR hit at our house!


(No product or monetary compensation was provided to Gonna Want This-Handmade for the completion of this Feature, 
nor were any of the vendor’s products reviewed.  This is an artist feature post only.)


Thursday, December 10, 2009

Baby Peas & Bees Review!

You may remember Baby Peas & Bees from the giveaway hosted during Launch Week HERE.  Missyt_2000@ was the winner of that one.  However Linda at Baby Peas & Bees provided me with a "Rose Cupcakes" product to review!

I was excited to receive the 'cupcakes' in the mail.  This is the box I received.  It came very promptly!  Baby Peas & Bees used reliable Priority Mail for her shipping.


The real treat, however, came when I opened the box.  The presentation was wonderful!  So great that I would feel completely comfortable ordering a gift item from Baby Peas & Bees for a new mommy friend and have it shipped directly to her if needed.  And it was packed solidly with packing peanuts cushioning the interior contents, as well as protective cellophane around the actual box of 'cupcakes'.  What a treat for that new mommy to open!  Here's some of my first glimpses at the "Rose Cupcakes"...


First Glimpse


 What a treat!


Love the colors - the box, ribbon, flower detail & 'cupcakes' inside all coordinated...and gave the feel of a real gourmet cupcake treat!


By this point I was thoroughly pleased with the presentation and was thinking of all of the new mommy-to-be's that I know that live in various places throughout the nation...what a great gift to send directly to a new mommy, especially if you can't travel to be at her baby shower or to visit her and the new one in the hospital after the birth.  Baby Peas & Bees offers all of their products in either boy, girl or gender neutral colors.

One of the things I was very interested in reviewing was the quality of the items used in the design of these gifts.  The gifts looked great, were creative and thoughtful - with attention to detail - but the real question I had now was how would the items used in the design hold up to regular use?


My apologies - I helped myself to a cupcake before getting a picture of all four in the box.  They were irresistible!  

Each rose cupcake is created with a baby washcloth and a baby sock.  So the box of four 'cupcakes' results in 4 baby washcloths and 2 pairs of baby socks.  The baby washcloths included with my baby cupcakes were "Especially for Baby" brand, a brand carried and distributed by Toys R Us.  I was pleased to discover that they were brand name items, carried by a major manufacturer and not cheapo knockoffs from the dime store.  The washcloths have a soft jersey side to them and a terry cloth side.  They are thick enough to hold up to sudsing and using to wash baby, but they are soft and gentle enough for baby's skin.  I checked the seams on the washcloths too - quality construction throughout.  After a few review (including using for washing, sending through the washing machine and dryer, and full inspection of the item, I can confidently say that these baby washcloths are quality items that not only look good when designed as a baby cupcake, but will be put to good use for baby too. 


What about those socks?  They were a tiny new baby size...and I was pleased to find out that they weren't all just one color - they had a design to them!  They were the thick, cushiony kind - perfect for keeping baby's feet warm and cozy, especially during these cold months!  The only seam on these socks was in the toe, and I checked those over thoroughly.  The seams were strong and reinforced and would hold up to regular infant wear as well as washing!  I put these socks through the washer and dryer a few times and they came out looking bright and fine!


In conclusion, I would highly recommend Baby Peas & Bees as a vendor for all your handmade, unique and baby gift needs!  You can purchase her items to use as a display and gift at a baby shower, as a unique gift at any baby occasion, and even to send to a friend or family member across the country with confidence that they will be receiving a wonderfully packaged original gift!

Customer Service:  Excellent, timely, easy to get ahold of the vendor
Packaging and Presentation:  Excellent - well packaged for travel, used a reliable mailing service, beautiful presentation.
Quality Construction:  Excellent - These 'cupcakes' were put together well, with attention to detail.
Quality Items:  Excellent - The items used in the construction of these 'cupcakes' were of quality material and are recommended for regular use.

Head on over to Baby Peas & Bees today to get an idea of what you can order for yourself or your favorite new parent/parent-to-be!  Here's a few other items from Baby Peas & Bees online shop:

 
Jungle Theme Diaper Cake - $45


Teapot Bouquet - $45


Pea Pod Washcloths-$10


Thanks Linda at Baby Peas & Bees for the opportunity to do this review!

(For the purpose of this review, I was provided with the product described free of charge to review.  However I was not monetarily compensated for this review and all feedback are my own honest opinions.)